Welcome

This blog is about two friends, miles apart, striving to pattern our lives after the Proverbs 31 woman. Here you will find our daily journeys, whether serious, funny, practical, or inventive. Thanks for stopping by and we hope you'll stop by often!

~Lauren & Page

Showing posts with label october. Show all posts

Thursday, October 14, 2010

Candy Clutch


I LoOoOove fabric shopping! About every few days you can find me wondering the isles of the many fabric stores around my town. One of my favorite fabric stores is Mangelson's! I found this cute vintage looking pumpkin fabric there and it inspired me to make this cute little reversible Candy Clutch! Here's the how-to :

You will need :


* Coordinating Fabrics
* Sewing Machine
* Iron
* Scissors
* Matching thread
* Pins
* Marker or pencil
* Ruler


First, cut fabric to 10 x 18 inches. Do this with the fabric you want for the outside and the inside.


With right sides together, fold fabric in half to measure 10 x 9 inches. The fold will be the bottom edge. Sew both sides together with a 1/4 inch seam allowance. Do this with both rectangles you cut.


With right sides together, fold fabric in half to measure 10 x 9 inches. The fold will be the bottom edge. Sew both sides together with a 1/4 inch seam allowance. Do this with both rectangles you cut.


Now we are going to 'Gusset' the corners to make the purse width.

Iron down the fold to crease the bottom. Match the side seams with the crease you just ironed and pin into place.


Mark 1 1/4 inches up from each side of the corner and connect your marks with a line. Sew on that line and trim off the corner above the line.


Do this to each corner on both fabrics.

Iron down 1 inch on the top. Do this for the inside and the outside fabric.

Turn the fabric you want for the outside, inside out. Place the other fabric inside of the outside fabric lining up the seams.


On the outside, lightly mark 2 inches from each seam. This is where you will place the handles when sewing everything together.

For the handles, cut 2 - 3 x 17 inch strips. Iron down 1/2 inch on both sides. Fold the strip in half lengthwise to make a 1 inch strap. Sew down both sides.

Start sewing around the top of the bag, placing the handles on the marks you made. Stuff 1 inch of the handles down between the inside and outside of the purse. Sew all the way around and your done!


For the cute fabric embellishment, I used a cup and traced out 4 circles on 2 different fabrics. I used pinking shears to cut them out. Pinking shears are scissors that are sawtoothed instead of straight.


I also cut out a slightly larger circle in black felt.

With your fabric circles, fold them in half twice and stitch the corners so that it stays in place.


I hot glued the pieces onto the middle of the felt circle and added some buttons to the center.


Because this purse is reversible, I wanted the fabric flower to be removable so I hot glued a safety pin on the back.


I can't wait to have a little girl to make purses for one day! Check in tomorrow for a Crafty Creation for a little boy!

*Jes*

Tuesday, October 12, 2010

October Wreath Tutorial


Ok... I'm nuts about this wreath that Jes made! It's so me... Wonder if I can bribe her out of it? : ) I just love all of the crafts she makes--and always look forward to what she sends me! Thank you so much, Jes!! ~Page


Fall is by far my favorite time of the year! Pumpkin pie, the smell of cinnamon, beautiful leaves, hoodies, dead bugs...YAY! My husband and I just moved into a new house, so I have been getting into the decorating mood... I rarely purchase decorations, because I would rather make them and have something unique that no one else has! I decided to make a October wreath to hang on our door yesterday, and I thought would share the process with you!

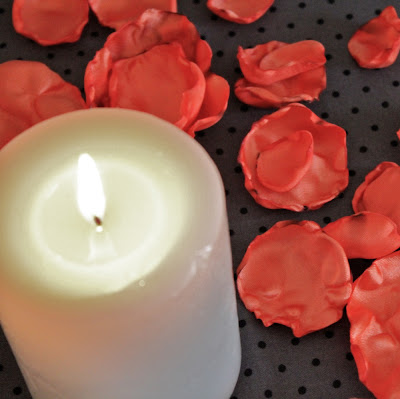
I started out by making some Burnt Flowers. You can learn how to make these by reading an earlier tutorial Lauren posted HERE.


I even made some flowers to put at the base of my candle!


To make my wreath I started out with a vine wreath that I found at the dollar store for $1!

Any old wreath can be repurposed for this project. Just tear off the dusty embellishments it already has on it and your ready to go!


My wreath was a little skinny for my taste, so I cut up strips of an old blanket and wrapped it around the wreath hot glueing it into place.


Next, I tore 2 inch strips of fabric. I really like the look of the frayed edges tearing fabric gives me. Most cotton fabric should tear easily.


Decide which side of your wreath is going to be the front and which is going to be the back. You should always start and end strips of fabric on the back side.

I hot glued on the first strip of fabric and starting wrapping it tightly around the wreath. Make sure that you maintain the width of your spacing as you wrap.


As you come to the end of a strip of fabric, hot glue on the back and glue a new strip where the last on ended. Continue wrapping until the entire wreath is covered.


Now you can embellish however you like! I hot glued my burnt flowers onto the wreath and then glued some beautiful, black ostrich feathers underneath the flowers!

I encourage you to make your own decorations, whatever the season is! Incorporate the things you like to make meaningful and unique decor!


Send in your creations for a chance to get it posted on our blog for others to see!! Can't wait to see them!!

Enjoy!

*Jes*

Monday, October 11, 2010

October Eye Candy!

I love seasonal decorating... It just has this way of really getting you in the mood for any season. And since I'm not quite ready to bring on all the full fledged fall furnishings... : ) I decided to try out some more "October" feeling decor...

Now--I'm not big on scare crows or scary halloween stuff... So what's a girl to do?

And then the answer came to me--in the mail! A while back, I posted about getting free stuff--and magazines are my particular favorite... That's how I ended up with an issue of Woman's Day this month--and it was full of the absolute cutest things to decorate with candy corns. Yes--yummy candy corns gone designer... I love these crafts!

They truly are beautiful and cute... I had to try one of them! So for this post, I picked the one I had the materials on hand for...

What you'll need:


*sticks/twigs
*something to put your sticks in (like a vase)
*hot glue gun
*candy corns


This is a very simple, very cheap, very quick, very cute craft. I only spent $1 on the candy corns--and the sticks were free in the back, front, and all around yard (remember, I live in the middle of nowhere, in the woods... good times!)

First--arrange your sticks in your vase of choice...

Then--get those extremely bad-for-you candy corns out of the bag... (REMEMBER--bad for you!)


And hot glue those bad boys to the sticks in various places... You can also glue them in cute little clusters, too... Just whatever you like best!


Put some of the candy corns in the bottom of the vase--and you're done! These twig crafts are extremely popular right now--but it has taken me some time to develop an appreciation for them... : )

Here is another really cute one I found today on WD's website. I REALLY love it... It may replace this one... : ) But if you're partial to the candy corns, check out this month's issue for some other really great ideas!

Look for many more crafts coming this week!! All "not quite fall" but not "scary Halloween" and, well... just right! : )

Take pictures of your crafts that you make and send them to us for your chance and getting your design featured on the blog! Can't wait to see them!

Hope you enjoy!

~Page