To wrap up this Christmas Crafty Creation marathon, I thought I would revisit an older Crafty Creation which you can find HERE. One of my favorite past times is quilling :D In the previous post about quilling, I introduced you to the craft and gave you a basic overview of how to do it. Today, I am going to show you step-by-step instructions on how to quill this BEAUTIFUL snowflake!!!
WAIT!!!! COME BACK!!!! It's not that hard..... I promise : )
I made a color coded pattern of the snowflake so that you could see the individual shapes. You can reference back to this picture if you are having trouble!

First, you need to cut your paper strips to size. I am using 1/8 inch quilling paper. Here are the lengths you need :
6 - 11 inch long strips
6 - 2 inch long strips
6 - 6 inch long strips
18 - 5 inch long strips
Other supplies that you need are tweezers, pins, clear tacky glue, a quilling tool, and a quilling board (optional).

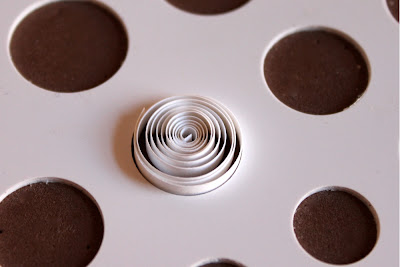
Take the twirled up paper off of the tool and place it into the 1/2 inch circle on the quilling board. Let the paper expand and fill up the circle. If you do not have a quilling board, let the paper expand in between two fingers until it is about 1/2 inch wide.

Put some tacky glue on the end of the paper and close the circle. I use a pin to apply the tacky glue. Let the glue dry for a few seconds--then, pinch both side of the circle simultaneously to form an 'eye' shape.


With your quilling tool start at one end and tightly twirl the paper inwards 2/3 of the way down one side. Slide the paper off of your tool and it should look something like this:

Put some tacky glue on the tip of an 'eye' shape and place it inside the 'heart' shape. Also glue the twirls of the 'heart' shape to the top sides of the 'eye' shape. The back of quilling boards are usually covered in foam. You can pin your shapes in place why your glue dries. If you do not have a quilling board, get a piece of cardboard or styrofoam and put wax paper on top of it ( so the glue doesn't stick to it) and pin your shapes on place. Glue all six of your 'eye' shapes inside of all 6 of your 'heart' shapes.

Now get your 2 inch strips of paper. Apply glue to 1/2 of one side. Fold the strip in half and let dry on a flat surface.

Now, for your 18 - 5 inch long strips of paper. Twirl a piece tightly onto your tool and DO NOT LET IT UNWIND! Glue the end down, and let the glue dry for a second before removing the tight circle from the tool. Do this with all 18 strips.

Glue 2 more tight circles below the tip.
(Pin down your shapes to keep them in place while the glue sets if you are having problems keeping things in place. )

Isn't it beautiful! The snowflakes are stronger than they appear to be, but if you want to add some extra strength and protection you can pray some clear / non-yellowing acrylic spray paint on it. Spray a VERY light, thin coat and let dry.

These make beautiful Christmas tree ornaments! You can also attach these to the front of Christmas cards, scrapbook with them, frame them, or hang them from your ceiling!
If you have any questions about the directions feel free to leave your question in the comment section and I'll get back to you as soon as possible!
I hope that you challenge yourself and explore this craft more! Let me know if you want instructions on how to make the 2 other snowflakes and I'll post them!
*Jes*


I have never heard of or saw this craft before! I usually do not leave comments, but I follow a lot of crafts blogs and most of the time they do stuff that has been done 1000 times before. It's hard to be original nowadays! Good to see that somebody is bringing something new to the table! HOORAY FOR QUILLING AND NEW DISCOVERIES! Hope ya'll have a Merry Christmas!
ReplyDeleteNot as hard as I thought it would be but still pretty intimidating! I'll still give it a try. Thanks for the instructions Jes!
ReplyDeleteTHIS IS BEAUTIFUL
ReplyDeleteOh MY!!!! Why am I just now seeing these snowflakes! I wonder if I'll have time to cover my tree in these this year??? Probably not, HA! Oh well, I'll have all of 2011 to make them for next Christmas !
ReplyDeleteStunning, Beautiful, Gorgeous!!!!!
ReplyDelete