So my twin sister in-laws will be turning 21 years old later this month and I needed to find a box to put their small presents in. I loOoOove when a gift is beautifully presented but I think it is such a waste when you wrap a present and the bow and wrapping paper are ripped off and thrown away! So with that in mind I set off to peruse the aisles of Hobby Lobby until I saw something that inspired me. In the Unfinished Wood aisle, I found these cute little round balsa wood boxes for $1.99 each.
 I immediately knew what to do with them...Wood Burning!
 A wood burning tool is a tool that heats up to very hot temperatures (hot enough to burn wood) and has interchangeable tips.


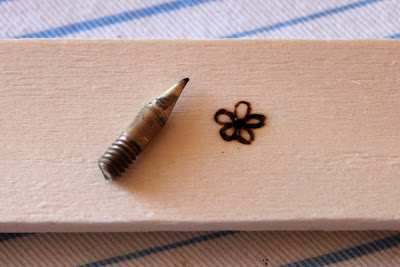
Each tip creates a different result. Here are a few of my tips and what they look like when used on a piece of wood:
 The Universal Point tip - Creates varied width lines and can be used for shading
The Dot Point tip - Used for detailed lines and making dots

The Grading Point tip - Used for burning large areas and shading
Before starting a wood burning project I always suggest practicing on a piece of scrap wood until you get a feel for each tip and what it can do.
If you are not very good at drawing, then you can always use stamps : )
After I finish the sketch I start burning the design onto the wood. You may encounter some smoke while burning the wood so a ventilated work space is probably not a bad idea ; ) 

I change my tips throughout the design to achieve the effects I want. When changing the tips use a gripping tool grip and unscrew the tips. The tips are way too hot to handle with your hands! 

This is just a quick overview of the wood burning process, but I hope it inspires you to try it out! It's really fun and different. I will post some pics of the finished boxes later on in the week for you to see!
There are so many possibilities with the craft of Wood Burning, have fun with it and let us know what YOU create!
~Jes
There are so many possibilities with the craft of Wood Burning, have fun with it and let us know what YOU create!
~Jes


I've never saw this type of craft before....but I like it! Can't wait to see the finished product! Please post pics!!!
ReplyDeleteWOW Jes, you've done it again! I'll be heading into town looking for wood burning supplies. I love to give hand crafted personalized gifts for Christmas. This is perfect. I bet I can find printable monograms online. Thanks again.
ReplyDeleteVery lovely! You did such a great job on it!
ReplyDeleteLovely! I woodburned a chair for a fundraiser last summer... http://www.flickr.com/photos/mwvchamber/4727561984/sizes/l/in/set-72157624215392823/ Here's another one I made too... http://www.facebook.com/pages/Becky-Foster-Artist/130543350306008?ref=mf#!/album.php?aid=21949&id=130543350306008 I'm hoping to do some more things with my kit. I just bought a book on how to build wooden boxes and I think it would be fun to build and burn them!
ReplyDeleteBlessings, and thanks for your blog,
Becky