
Ok--so, I looooOOOOOOooooove fabric flowers. This is one trend that I am totally smitten with. They are so versatile. They can make a statement, add flair, and just say something about you. (Yes--all of that from one little accessory!)
I don't know if many of you are as crazy about these as I am--but if you are, I'm sure a lot of you have priced them, and then rethought letting yourself become addicted to these little staples.
So, here AP31 is to save the day! Let your addiction fly--because these are SO EASY and way cheap to make.
This weekend, we are going to show you a few different types of fabric flowers, and how to make them.
First up: "Rosettes"
You will need:

*a strip of fabric
*needle and complimentary thread
*tacky glue

Choose a fabric that is fun and represents you! I had this one on hand--found at Walmart on clearance for next to nothing. Me likey! : )

One thing I want to stress is that flower making of any kind is not an exact science--but that is part of the beauty of it. I ripped a strip of fabric that was around 3" or so thick, and quite long. Making the strip too long leaves me the ability to keep going as long as I want--and to fluff all that I want to fluff. : )
Fold your strip in half, sew a little stitch...

and start rolling!

I begin with a roll--all of this to my taste--and add stitches here and there as I go to keep everything where I want it!

The further I go--the more I start playing around with the fabric. I move it up and down--puff it up here and there--loose here, tight there... All whatever is pleasing to the eye. Just placing enough stitches to keep everything where I want it.
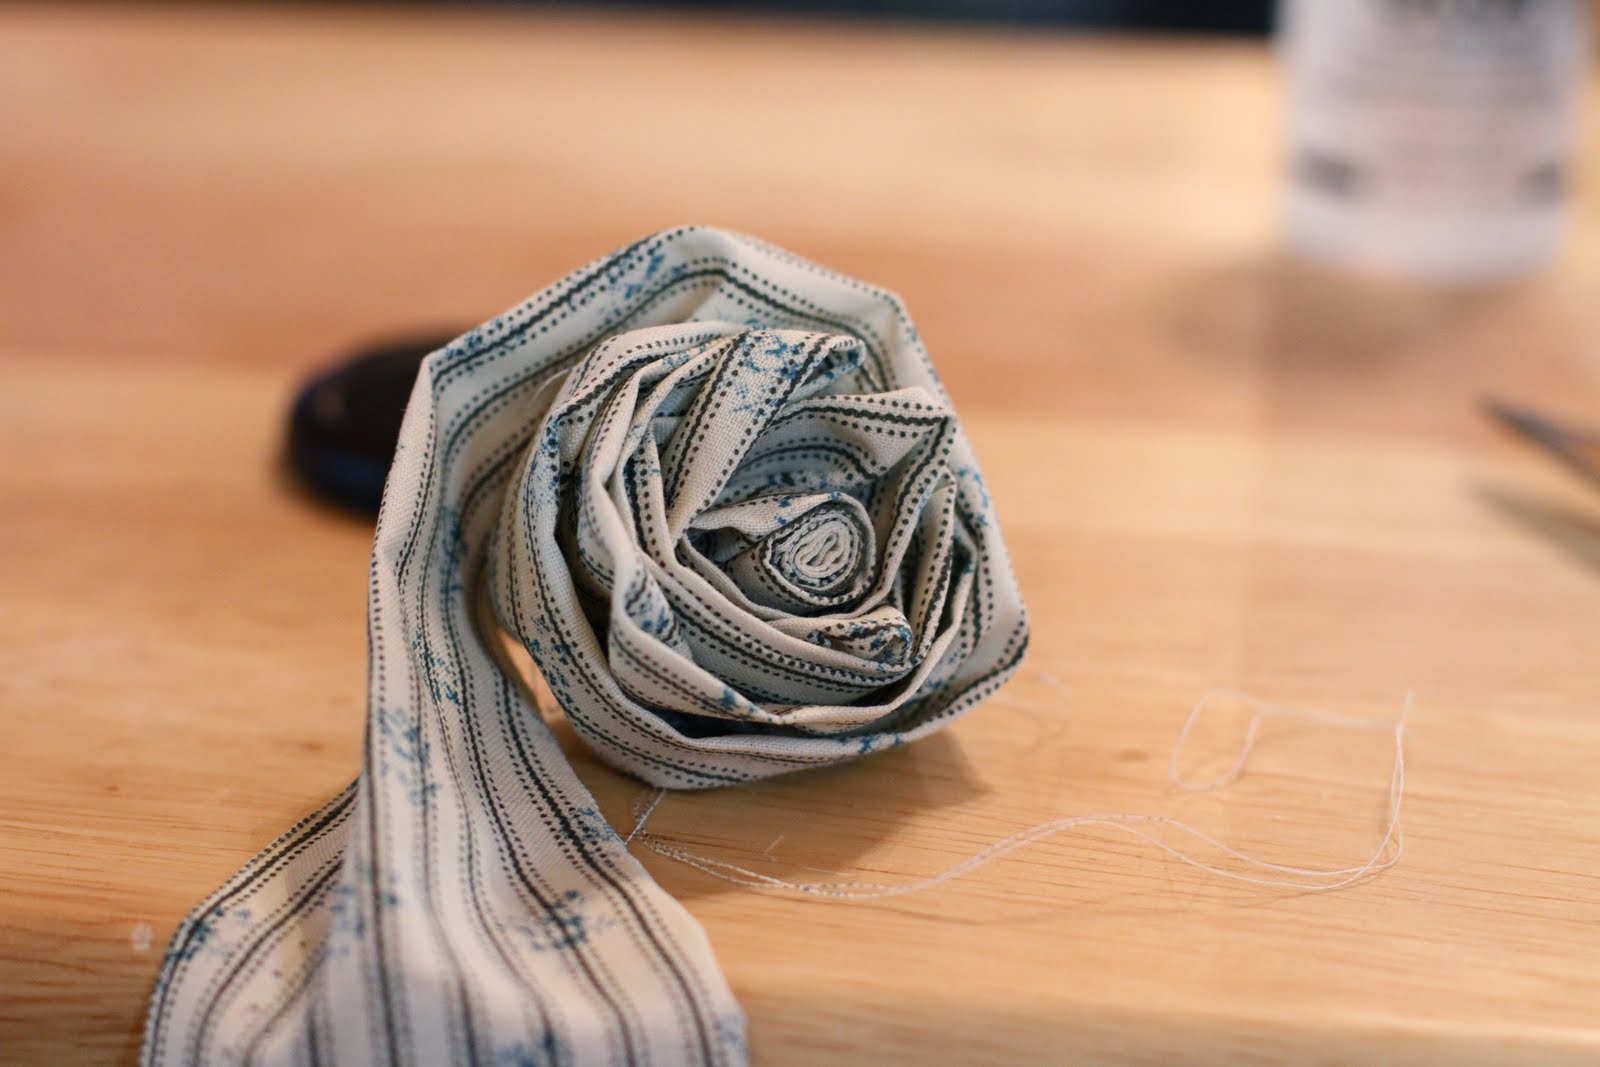


until you are happy and love it!

And then you're done!
It may need a little "poofing" and shaping in the end. Remember, make it just how you want to!

Now, most stop here--but I like to go one step further. I hate the way these look on the back, when you can see all the stitching.

Not pretty.


No comments:
Post a Comment